
Related Articles


Transform Your Home into a Peaceful Sanctuary: Beginner Methods for DIY Soundproofing
🛒 Shopping List
- Acoustic panels (€50–€150)
- Mass-loaded vinyl (€30–€80)
- Soundproofing foam (€20–€60)
- Carpet or rugs (€30–€150)
- Heavy curtains or drapes (€40–€100)
- Weather stripping (€10–€30)
- Green glue (€20–€50)
- Drywall (€20–€60)
✅ Outcome
- Professional finish with safe anchoring.
- Beginner-friendly, clean tools list.

Are you tired of your home being a cacophony of noise? Whether it’s the relentless sounds of traffic, boisterous neighbors, or even the echo of your own family’s daily activities, sound can be a significant source of stress. The good news is that you don’t need to be a professional to effectively soundproof your space. With a little time and effort, you can create a quieter, more serene environment. Let’s dive into some beginner-friendly methods for DIY soundproofing that will help transform your home into a peaceful sanctuary.
Overview
Soundproofing is the process of reducing or eliminating sound transmission from one area to another. This can be particularly useful in urban settings or multi-family housing, where noise can be a constant nuisance. There are various techniques and materials available to achieve effective soundproofing, ranging from simple DIY projects to more complex renovations. Alternatives to DIY soundproofing include hiring professionals or purchasing ready-made soundproofing solutions, but these can be costly. In this guide, we will focus on budget-friendly DIY methods that anyone can try.
Materials
- Acoustic panels
- Mass-loaded vinyl
- Soundproofing foam
- Carpet or rugs
- Heavy curtains or drapes
- Weather stripping
- Green glue (for drywall applications)
- Drywall (if replacing or adding layers)
Tools Needed
- Measuring tape
- Utility knife
- Drill and drill bits
- Screwdriver
- Level
- Staple gun
- Caulking gun (for sealant)
- Paint roller and tray (if painting)
Preparation
Before starting your soundproofing project, it’s essential to assess your space. Identify the main sources of noise and the areas where the sound is most prominent. Pay attention to windows, doors, and walls that may be allowing sound to seep through. Make a note of any gaps or cracks that need sealing. This initial assessment will guide you in choosing the right materials and methods for your specific situation.
Step-by-Step Instructions
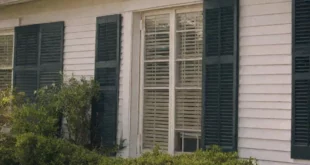
- Identify sound leaks … Begin your soundproofing journey by walking around your home and listening carefully for unwanted noise. Pay special attention to windows, doors, and walls that adjoin noisy rooms or outside. Use your measuring tape to measure and note down any gaps or cracks that could be allowing sound to enter your space. A good idea is to have a friend or family member help you by making noise while you stand in different rooms to see how it travels. Once you’ve identified the main culprits, you can create a plan for which methods will best address each issue.
- Seal gaps and cracks … After identifying the sound leaks, the next step is to seal them up. Use weather stripping to seal the edges of windows and doors. This will not only help with soundproofing but also improve your home’s energy efficiency. For cracks in walls, use caulk to fill in gaps, especially around outlets and light switches. A caulk gun will make this process easier, and be sure to choose a product that’s suitable for indoor use. If you have larger gaps, consider using expanding foam or acoustic sealant for a more robust solution. Once sealed, you’ll be amazed at how much quieter your space can become!
- Add soft furnishings … Soft furnishings can absorb sound and help reduce noise levels in your home. Consider adding rugs, carpets, or heavy curtains in your living spaces. If you already have hardwood or tile floors, a thick rug can significantly dampen sound. Heavy curtains not only block light but also help to absorb sound, making them a great addition to any room. When choosing curtains, opt for thick, plush fabrics for the best results. Additionally, throw pillows and upholstered furniture can also assist in reducing sound reflections, so don’t hesitate to incorporate these elements.
- Install acoustic panels … Acoustic panels are specifically designed to absorb sound and reduce noise levels. They come in various sizes and colors, so you can choose options that match your decor. To install, start by determining where the panels will have the most impact—typically on walls opposite sound sources. Use your measuring tape to ensure even spacing, and mark the locations with a pencil. Follow the manufacturer’s instructions for installation, which may involve adhesive strips or screws. Once installed, you’ll notice a significant reduction in echo and noise levels.
- Use mass-loaded vinyl … For areas where sound transmission is a significant concern, mass-loaded vinyl (MLV) is an excellent solution. This heavy, flexible material can be installed under carpets, behind drywall, or over existing walls to block sound. If you’re adding it behind drywall, first remove the existing drywall, cut the MLV to size, and attach it directly to the studs. Then, reattach the drywall, sealing the edges with caulk to prevent sound leaks. MLV is a fantastic option for home theaters or music rooms where you want to minimize sound leakage.
- Consider green glue for walls … If you are planning on renovating or adding new drywall to your space, consider using green glue between the layers of drywall. This soundproofing compound is designed to reduce sound transmission significantly. Apply it to the back of the new drywall before installation, following the manufacturer’s directions. This method can be more involved, but the results are worth the effort if you’re looking for a long-term soundproofing solution.
- Rearrange furniture wisely … Sometimes, simply rearranging your furniture can help with soundproofing. Place larger furniture items, such as bookshelves or sofas, against walls that face noisy areas. These items can act as barriers, absorbing sound before it travels further into your home. Try not to place furniture directly in front of windows or doors, as this can create gaps for sound to seep through. A thoughtful arrangement of furniture can enhance your soundproofing efforts and create a more inviting atmosphere.
- Maintain your outdoor space … If outdoor noise is a concern, consider adding outdoor sound barriers like trees, shrubs, or fences. Planting trees or tall shrubs can create a natural barrier, absorbing and deflecting sound. Additionally, a solid fence can help block noise from nearby roads or neighbors. Keeping your outdoor area well-maintained will not only improve your soundproofing but also enhance your home’s curb appeal.
Tips & Techniques
Common Mistakes
- Neglecting to seal gaps and cracks before beginning other soundproofing methods.
- Overlooking the importance of soft furnishings in sound absorption.
- Using lightweight or thin materials that won’t effectively block sound.
Safety Advice
- Wear safety goggles and gloves when handling materials like drywall or using power tools.
- Ensure proper ventilation when using sealants or adhesives indoors.
- Be cautious when working on ladders, particularly during installation projects.
FAQ
Q? How long does DIY soundproofing take?
A. The time required varies based on the size of your project and the methods you choose. Simple tasks like sealing gaps can take a few hours, while larger projects like installing acoustic panels or drywall may take a day or more.
Q? Can I soundproof just one room?

A. Yes, you can focus your soundproofing efforts on one specific area, such as a home office or music room. Just remember that sound can travel through common walls, so addressing adjacent spaces may also help.