Learn how to effectively seal leaking basement wall cracks using an epoxy injection kit. Understand types of cracks, materials required, and follow our step-by-step guide!
Seal Leaking Basement Wall Cracks with Epoxy Injection Kit – DIY Guide
admin7971
November 23, 2025
Tool Reviews
9 Views
Seal Leaking Basement Wall Cracks with Epoxy Injection Kit – DIY Guide
Seal Leaking Basement Wall Cracks with Epoxy Injection Kit
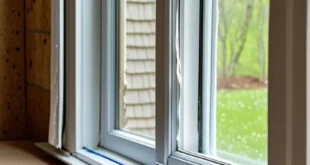
Understanding Basement Wall Cracks
Types of Basement Wall Cracks
- Vertical Cracks: These cracks result from settling and shifts in the foundation. They are common in poured concrete walls and aren’t serious unless they widen significantly.
- Horizontal Cracks: Caused by hydrostatic pressure, these cracks can affect the structural integrity of the wall and require immediate attention.
- Stair-step Cracks: These cracks appear in block walls due to foundation movement and follow the mortar joints in a pattern resembling stairs.
Common Causes of Leaking Basement Wall Cracks
- Settling: Foundation adjustments over time can create entry points for water.
- Hydrostatic Pressure: Excessive water pressure from heavy rain or insufficient drainage can exert force on walls.
- Temperature Fluctuations: Expansion and contraction of concrete can weaken the structure over time, leading to cracks.
Importance of Promptly Addressing Cracks
- Preventing Water Damage: Addressing cracks quickly prevents costly repairs and hazards such as mold from water intrusion.
- Maintaining Structural Integrity: Timely repairs help prevent the worsening of cracks and potential building instability due to water exposure.
- Preserving Property Value: Keeping basements in good condition enhances your home’s marketability and overall value.
Benefits of Using an Epoxy Injection Kit
Strong Adhesive Properties of Epoxy
- Forms a bond that is tougher than concrete, effectively stopping future water leaks with a durable waterproof seal.
Resistance to Water and Chemicals
- Creates a long-lasting waterproof barrier that withstands moisture and harsh chemicals.
DIY Friendly and Cost-Effective Solution
- Allows homeowners to achieve professional-grade results with minimal tools, reducing the need for contractor services.
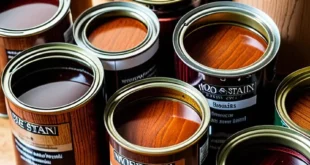
Materials Needed
- Epoxy Injection Kit: Contains resin, hardener, and injection ports for precise application.
- Concrete Patching Compound: Optional for smoothing larger cracks after repair.
- Wire Brush or Grinder: Cleans cracks to enhance adhesion.
- Masking Tape and Plastic Sheeting: Protects surrounding areas from spills and mess.
- Caulking Gun: Ensures controlled application of epoxy.
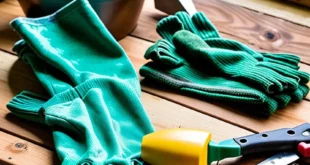
- Safety Goggles and Gloves: Protects against harmful materials during the repair process.
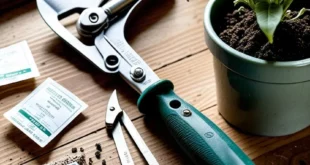
Tools Required
- Drill with Masonry Bits: For creating holes to insert injection ports.
- Putty Knife: To smooth patching compounds applied to the cracks.
- Mixing Stick: Ensures thorough blending of resin and hardener in the epoxy kit.
- Paintbrush or Roller: For even application of sealant over repaired areas.
- Vacuum Cleaner or Compressed Air: To remove debris for better epoxy bonding.
Step-by-Step Instructions for Sealing the Crack
- Identify and Clean the Crack: Use a wire brush and vacuum to ensure a clean bonding surface.
- Protect Surrounding Areas: Apply masking tape and plastic sheeting to minimize mess during the repair.
- Prepare the Epoxy Injection Kit: Mix resin and hardener according to the manufacturer’s instructions for optimal results.
- Inject the Epoxy into the Crack: Start at the bottom and work upwards to ensure the crack is completely filled.
- Allow the Epoxy to Cure: Follow the manufacturer’s recommendations for curing time to achieve the best seal.
- Apply Concrete Patching Compound: If necessary, smooth the repaired area for an aesthetically clean finish.
- Final Inspection and Touch-Ups: Check for any missed areas that need more epoxy and reapply if necessary.
Aftercare and Prevention Tips
- Monitor for Signs of Moisture: Regularly inspect the repaired areas for any indications of new leaks.
- Consider Exterior Drainage Solutions: Improving exterior drainage can significantly reduce pressure on the basement walls.
- Regularly Inspect for New Cracks: Early detection of cracks helps maintain the health and integrity of the structure.
Warnings
- Always wear safety goggles and gloves to protect against epoxy and dust.
- Ensure good ventilation in your workspace while handling epoxy and chemicals.
- Carefully follow the manufacturer’s instructions for safe handling and application of the epoxy kit.
Check Also
Discover how to select the best cordless drill for your home renovation needs. Explore crucial features, specifications, and expert tips.