Related Articles


How to Replace a Broken Ceramic Bathroom Tile Without Damaging Surrounding Grout or Tiles
Introduction
Ceramic bathroom tiles are essential for both appearance and water protection. When a tile cracks or breaks, prompt replacement is necessary to prevent larger problems such as leaks or mold. Avoiding damage to the surrounding grout or tiles requires care, thorough preparation, and proper installation. This guide will show you how to replace a broken ceramic bathroom tile with professional results, ensuring your repair is durable and blends seamlessly.
In high-moisture bathroom areas—such as showers, tub surrounds, and floors—even minor installation errors can allow water intrusion and hidden damage. Follow these steps for lasting results and a high-quality, watertight finish.
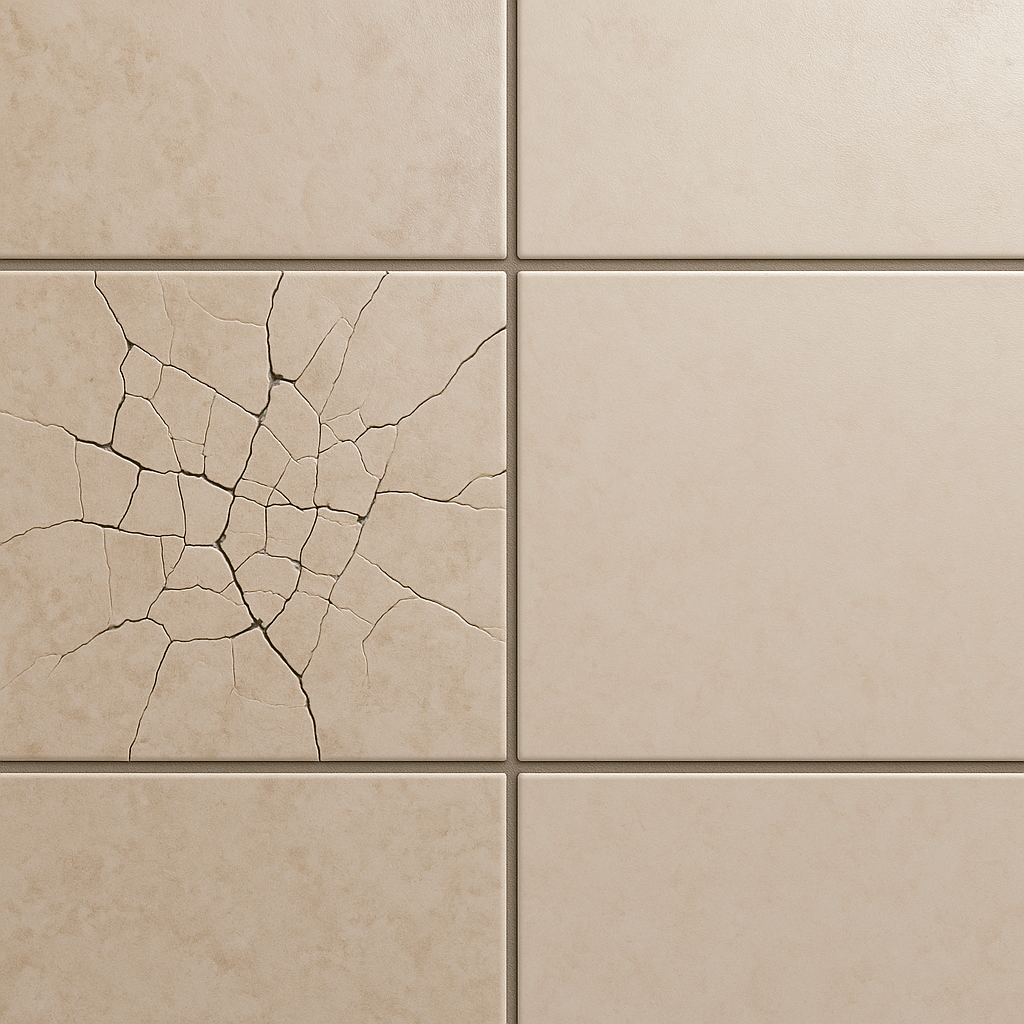
Assess the Damage and Plan the Repair
- Evaluate the tile:
Inspect the damaged tile. Is it a minor chip, a deep crack, or completely shattered? Check nearby tiles for looseness or cracks and examine grout for gaps or discoloration that could indicate water intrusion.
Tip: Small chips may be repairable, but fully cracked or loose tiles should be replaced to prevent future leaks.

- Identify underlying issues:
Press around the damaged area. Softness or movement in the substrate may indicate water damage or structural issues. Fix any moisture or substrate problems before installing the new tile.
Pro tip: Use a moisture meter. Readings above 16% mean moisture issues must be resolved first.
- Find a matching tile:
Find a replacement tile that matches in size, color, and pattern. If an exact match isn’t available, use it in a less visible spot or blend it into a pattern.
- Ensure matching grout:
Select grout that closely matches the color and texture of your existing grout. Compare options in both natural and artificial light.
Tip: Use sanded grout for joints wider than 1/8″ (floors) and unsanded grout for narrower joints (walls).
Gather Tools and Materials
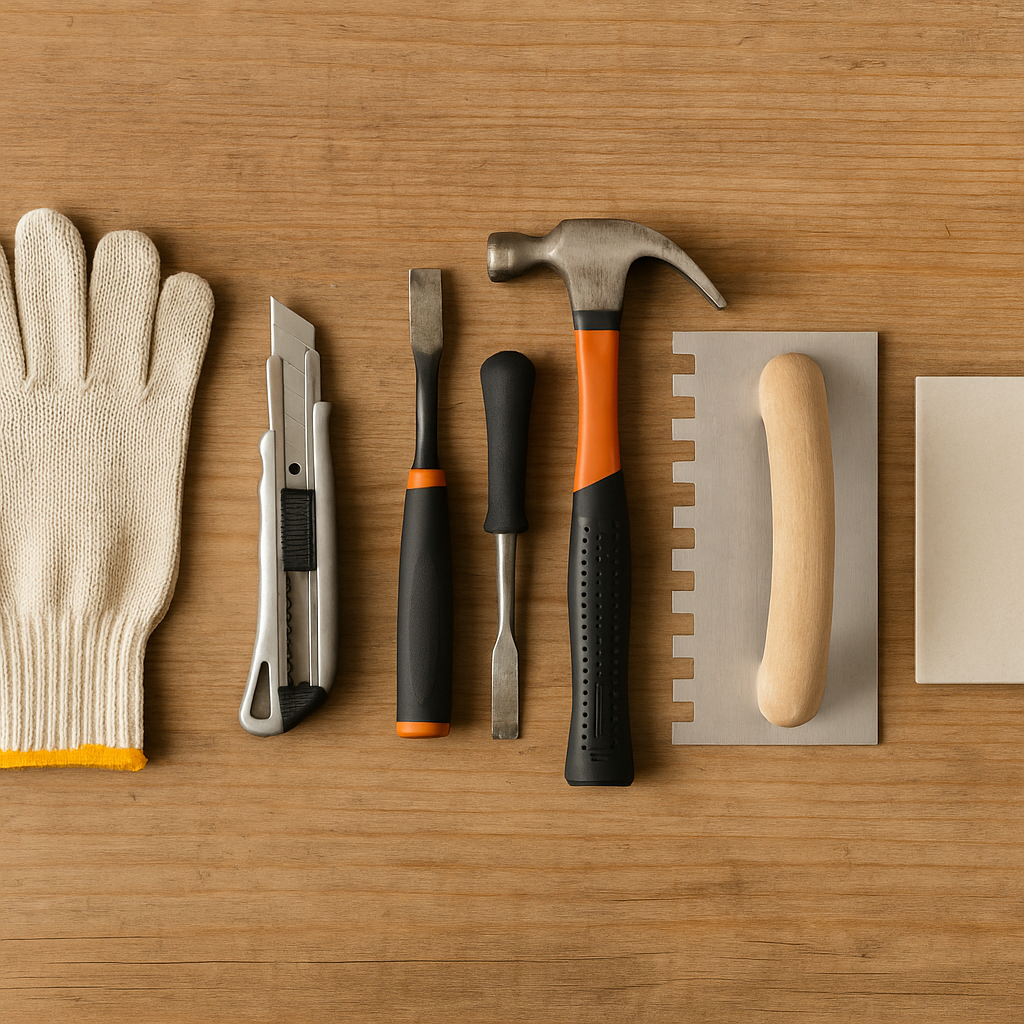
Essential Tools
- Grout saw or rotary tool with grout-removal bit
- Utility knife
- Small chisel
- Hammer
- Putty knife or scraper
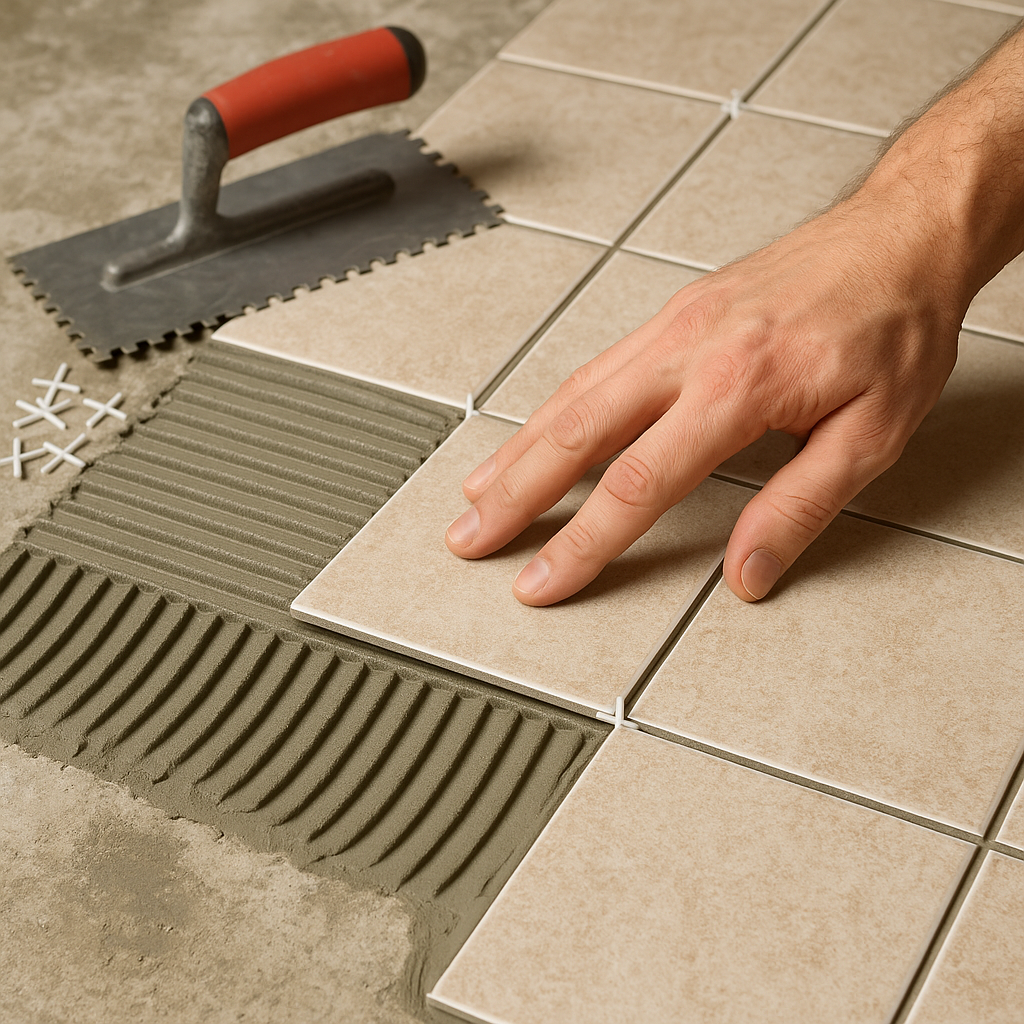
- Notched trowel (1/4″ x 1/4″ for floors; 1/8″ for walls)
- Tile spacers
Materials
- Matching ceramic replacement tile
- Color-matched grout
- Thin-set or pre-mixed tile adhesive (use modified thin-set in wet areas)
- Grout sealer
Safety & Convenience Supplies
- Painters or masking tape (use two layers to protect remaining tiles)
- Plastic sheet or drop cloth
- Safety glasses
- Work gloves
- Clean water and sponge
- Knee pads (optional)
- Dust mask (recommended when removing grout or breaking tile)
Preparation and Safety
- Clear the area: Remove rugs, toiletries, and any items in the workspace to prevent damage and allow easy access.
- Protect surrounding tiles and grout: Apply painters tape to the edges of adjacent tiles and grout to avoid chips or scuffs.
- Cover the floor: Use a drop cloth or plastic sheet to catch debris and for easy cleanup.
- Ensure dryness: The area must be dry to ensure good adhesive performance and safety.
- Water precautions: If working near plumbing, turn off the water and cover drains to keep debris out of pipes.
Remove the Broken Tile
- Cut away grout:
With a grout saw, rotary tool (set to low), or utility knife, carefully remove grout around the broken tile. Avoid scratching intact tiles. Remove all grout to fully separate the tile. Avoid high-speed tools to minimize chipping.
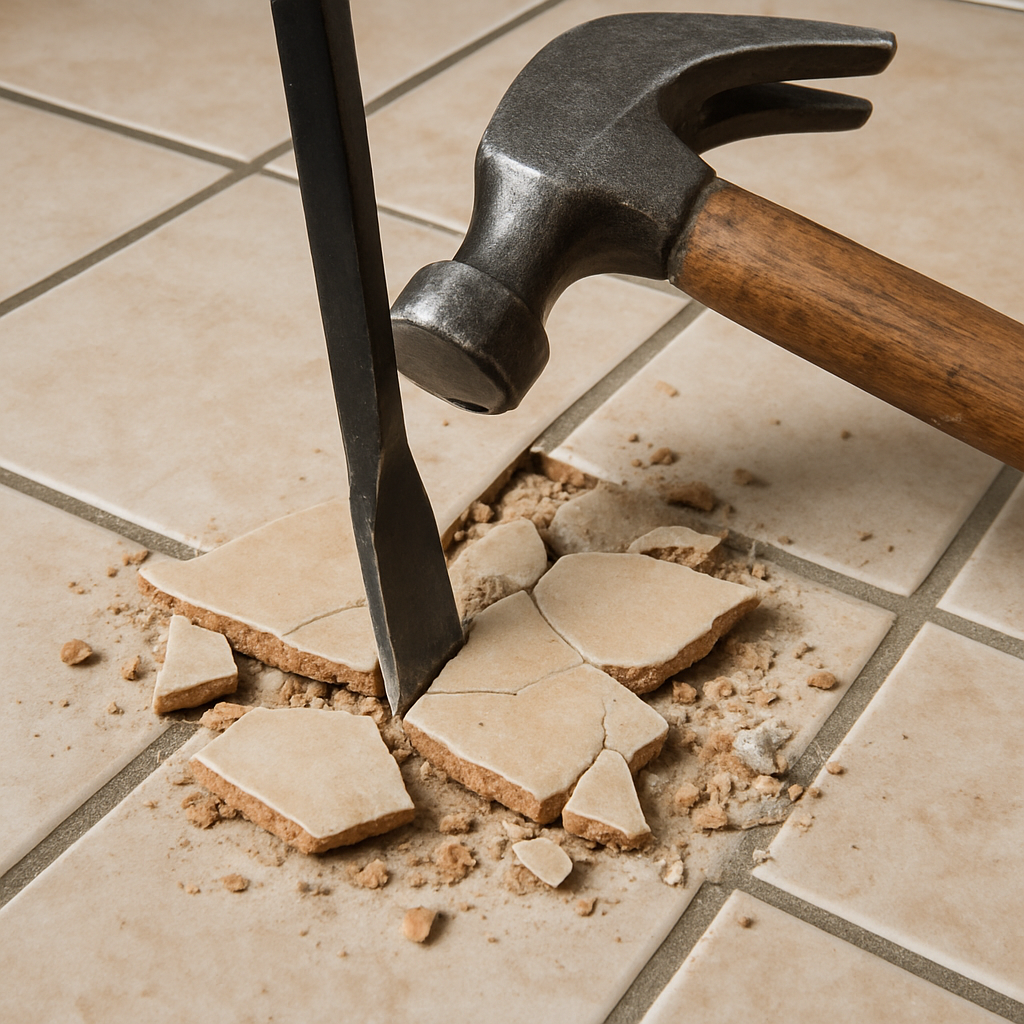
- Break the tile:
Wear safety gear—goggles, gloves, and a dust mask. Drape a cloth over the tile, then gently tap a chisel at the center with a hammer. Cracking from the center helps protect the surrounding tiles. Use only light force.
- Remove tile fragments:
Starting at the center, use a putty knife or chisel to gently lift tile pieces, minimizing the risk to nearby tile edges and grout.
- Clean the cavity:
Scrape away all old mortar or adhesive and clear out debris until the area is clean and level. Address any substrate issues before continuing. Wipe with a damp sponge and let dry thoroughly.
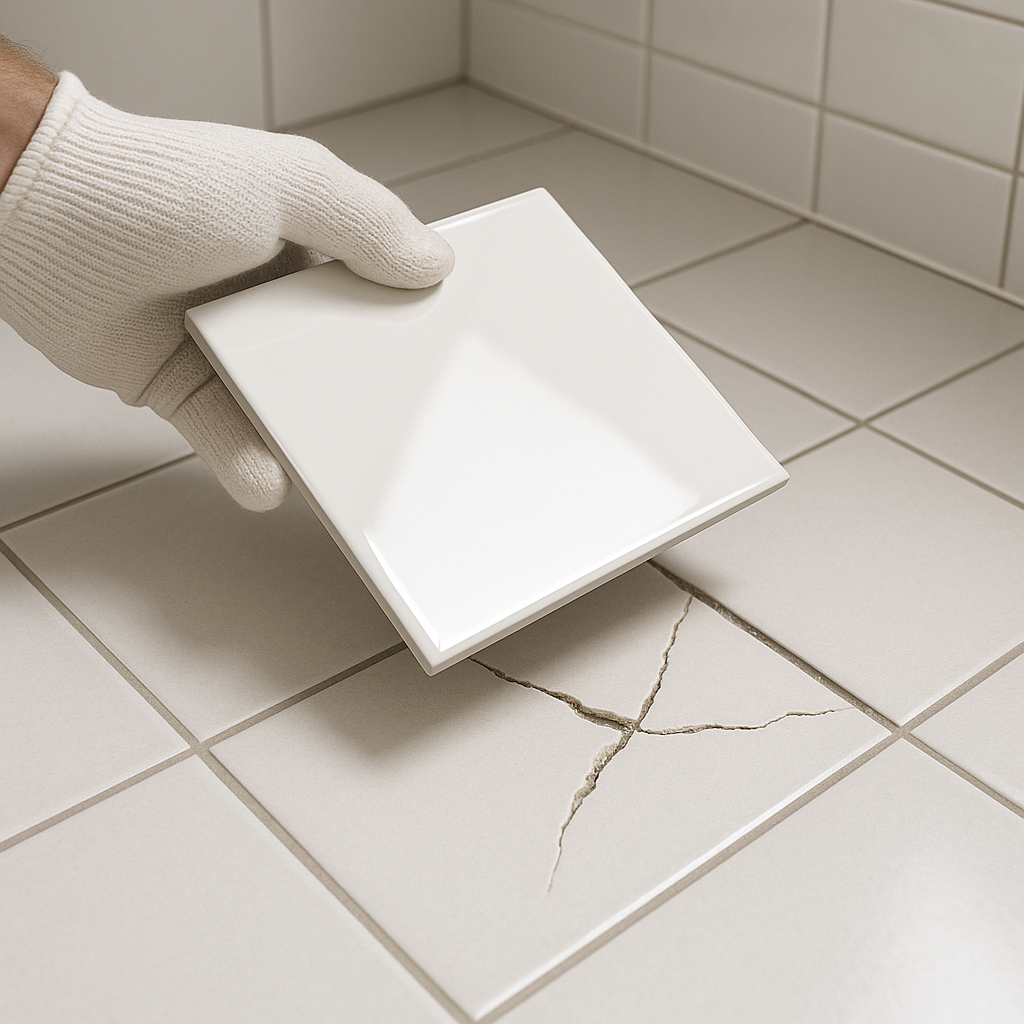
Install the Replacement Tile
- Dry-fit:
Place the new tile in the opening to check the fit. If necessary, sand or trim edges to ensure a snug fit. Use suitable tools and take safety precautions.
- Apply adhesive:
With a notched trowel, spread a thin, even layer of thin-set adhesive on the substrate. For tiles larger than 8″x8″, also butter the back of the tile. Avoid using mastic in wet areas.
- Set the tile:
Press the tile into place, using spacers for even grout joints. Check that the tile is level with the surrounding tiles before the adhesive sets.
- Let adhesive cure:
Allow at least 24 hours (or as recommended by the adhesive manufacturer) for curing. Avoid disturbing or using the area during this time.
Grout and Seal
- Mix grout:
Mix grout to a peanut butter-like consistency, following package directions. Only prepare what you can use within 30–45 minutes.
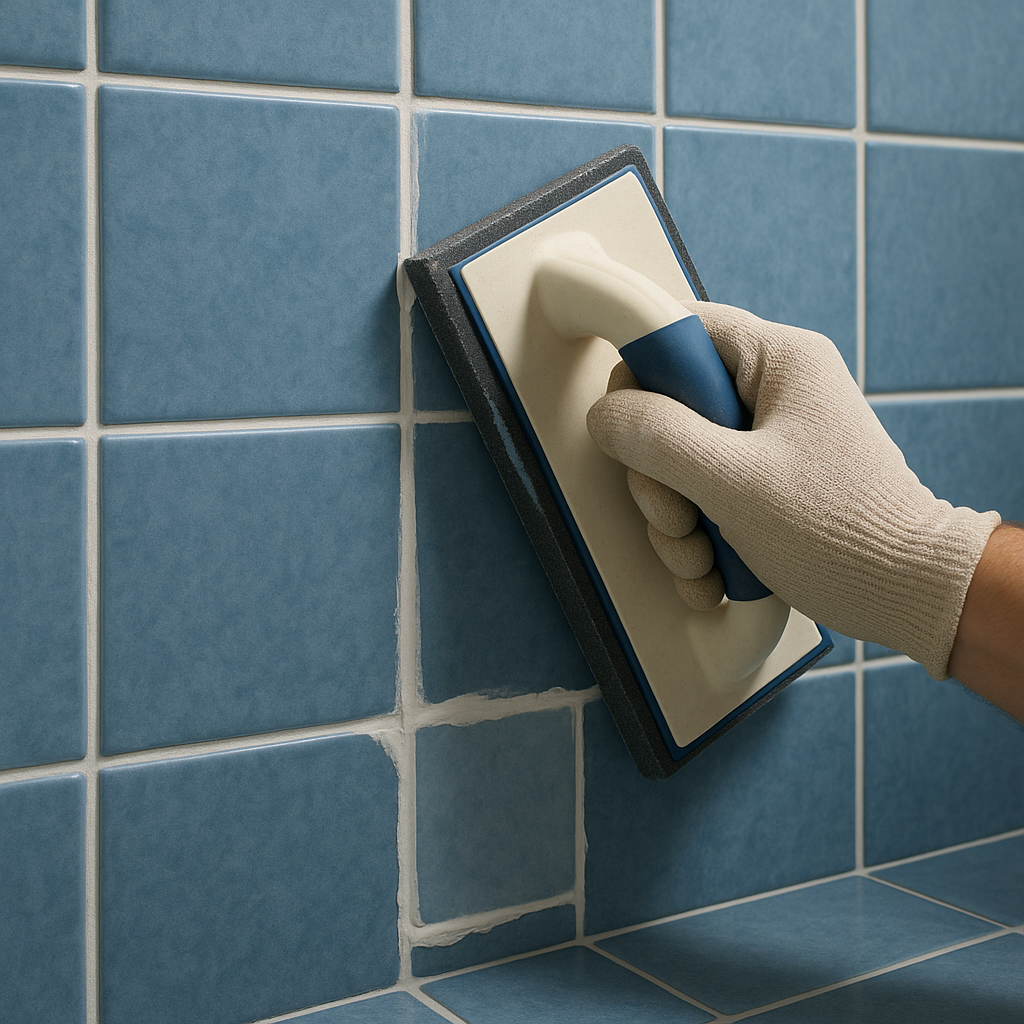
- Apply grout:
Using a rubber float at a 45-degree angle, press grout into the tile joints, completely filling all gaps. Wipe away any excess.
- Clean excess:
Wipe the surface diagonally with a barely damp sponge. Rinse often and avoid removing grout from the joints.
- Allow grout to set:
After 15–30 minutes, gently buff away any haze with a dry, soft cloth.
- Seal grout:
Once the grout cures (usually 48–72 hours), apply sealer to the joints. Wipe any excess sealer off tile surfaces before it dries.
Note: Epoxy or specialty grouts might not need sealing; check the packaging.
Inspection and Care
- Inspect the repair:
Make sure there are no cracks, uneven grout, or gaps where water could get in. Touch up as needed for a watertight finish.
- Allow full cure:
Let adhesives and grout cure fully (usually 2–3 days) before using water or cleaning chemicals on the area.
- Replace fixtures and clean up:
Once everything is fully set, reinstall fixtures and thoroughly clean your workspace and tools.
- Ongoing care:
Regularly clean grout with non-abrasive cleaners, reseal as needed, and repair any small cracks promptly to prevent bigger problems.
Tip: In humid bathrooms, use an alkaline-pH cleaner and keep the room well-ventilated to prevent mold.
Common Mistakes to Avoid
- Using excessive force or the wrong tools:
Forcibly removing the tile or using improper tools can damage neighboring tiles. Work slowly and use the right equipment.
- Skipping steps:
Skipping moisture checks or substrate preparation can lead to poor results and leaks.
- Poor grout matching:
Obvious mismatches are noticeable. Always select the closest possible grout color and texture.
- Ignoring drying times:
Not allowing proper curing can compromise the repair. Always follow manufacturer instructions.
Materials Checklist
- Replacement ceramic tile (matching size, color, and pattern)
- Color-matched grout
- Thin-set adhesive or pre-mixed tile adhesive
- Grout sealer
- Painters or masking tape
- Plastic sheet or drop cloth
- Clean water and sponge
- Grout saw or rotary tool (grout-removal bit)
- Utility knife
- Hammer
- Small chisel
- Putty knife or scraper
- Notched trowel
- Tile spacers
- Safety glasses
- Work gloves
- Knee pads (optional)
- Dust mask (for grout removal or breaking tile)
Quick Step-by-Step Guide
- Turn off water supply if needed.
- Clear and protect the workspace with a drop cloth.
- Mask the edges of nearby tiles with painters tape.
- Ensure the area is dry before starting.
- Carefully remove grout around the broken tile using a grout saw, rotary tool (on low), or utility knife.
- Wearing safety gear, cover the broken tile with a cloth and break it in the center using a hammer and chisel.
- Remove tile fragments from the center outward, taking care not to damage adjacent tiles.
- Scrape off all old adhesive and debris. Repair any substrate issues before moving on.
- Dry-fit the new tile and adjust as necessary for a good fit.
- Apply thin-set adhesive, set the tile with spacers, and press it in place.
- Check that the tile is level and properly aligned.
- Allow adhesive to cure for at least 24 hours or as specified.
- Mix and apply grout, filling all joints.
- Wipe away grout residue with a barely damp sponge.
- Buff off any haze with a soft, dry cloth.
- After curing (48–72 hours), seal the grout joints if required.
- Inspect your work and make any necessary touch-ups.
- Replace bathroom fixtures and thoroughly clean up.
Safety Reminders
- Always wear safety glasses, gloves, and a dust mask for protection.
- Work slowly and patiently to avoid damaging adjacent tiles.
- Do not use excessive force when removing grout or tile pieces.
- Keep your work area dry for safety and proper adhesion.
- Ventilate the area when working with adhesives, grout, or sealants.
- Follow all manufacturer directions for tools and materials.
- Dispose of broken tiles and debris in accordance with local regulations.
{}

