Related Articles


Best Way to Insulate an Old Attic With Spray Foam Without Removing Existing Fiberglass Batts
Introduction
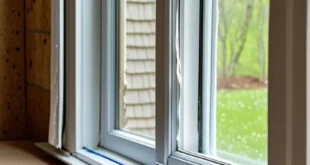
Insulating an old attic often presents unique challenges—think awkward spaces, tricky nooks, and insulation that’s seen better days. Many older homes suffer from compressed or shifted fiberglass batts, persistent air leaks, and high utility bills due to poor attic insulation.
Upgrading with spray foam insulation—without removing existing fiberglass batts—can be an efficient and practical solution when handled correctly. This technique boosts air sealing, increases overall R-value, and saves time and money by allowing you to leave existing batts in place. While spray foam creates an effective air barrier, the fiberglass batts provide thermal resistance. It’s essential, though, to ensure your current batts are dry and in good condition—and that local building codes permit this layered approach.
This step-by-step guide shows you how to add spray foam over fiberglass batts where appropriate, with a focus on improving comfort year-round, enhancing energy savings, and strengthening attic durability. Tailored for DIYers, the instructions place safety first. If you’re aiming to minimize drafts, reduce heat loss, and protect against moisture and pests, this method delivers strong performance with minimal home disruption—as long as it’s done according to all safety, manufacturer, and code requirements.
Understanding Attic Insulation Types
Fiberglass Batts: Advantages and Limitations
Fiberglass batts are popular for their affordability and easy installation between joists and rafters. However, they also have several drawbacks:
- Compression reduces effectiveness—a 6-inch R-19 batt may perform at just R-13 if compressed.
- They permit air leakage—without air sealing, drafts can bypass the insulation, reducing efficiency.
- Misaligned or gapped batts are common, leading to energy loss and possible moisture problems.
- Moisture can get trapped, leading to mold and rot. Wet batts dramatically lose insulating value.
Tip: Fiberglass batts perform best when undisturbed and combined with a solid air barrier. By themselves, they’re limited without proper air sealing.
Spray Foam: Open-Cell vs. Closed-Cell
Spray foam insulation is available as two main types:
- Open-cell spray foam: R-value about 3.5–4 per inch. Semi-permeable to moisture, it expands to fill nooks and crannies, making it best for interior attic use.
Example: Excellent between joists in vented attics or roof decks where some vapor transmission is acceptable.
Note: Open-cell foam can absorb moisture if a roof leak occurs, potentially shortening its life. Not suitable where significant moisture is likely. - Closed-cell spray foam: R-value 6–7 per inch, acts as both air and vapor barrier, and adds some structural strength. It resists water and is ideal for potentially damp areas.
Example: Use around attic perimeters or roof decks, especially where a strong vapor and air barrier is needed in colder or mixed climates.
Insight: Closed-cell foam can reinforce framing, valuable in storm-prone regions.
Both types adhere well to building surfaces, but it’s vital to check local code for required R-values, vapor barrier rules, and fire safety before installing spray foam. Never install spray foam near heat-producing fixtures or on electrical components that aren’t rated safe for insulation contact.
How Spray Foam and Fiberglass Batts Work Together
Using spray foam and fiberglass batts together leverages the strengths of both: foam seals out air leaks, and batts add thermal performance. Spray foam is effective for sealing leaks at attic edges and penetrations, while batts help maintain thermal integrity, provided conditions remain dry.
Advanced strategy: Try the “flash-and-batt” method: apply a thin layer of closed-cell spray foam (1–2 inches) on attic surfaces for air and vapor blocking, then layer unfaced fiberglass batts for additional R-value. Don’t add a second vapor barrier above the batts, and always match vapor barrier placement to climate and code.
Attic Assessment: Preparation and Inspection
Inspect Fiberglass Batts
Before spraying foam, thoroughly inspect the existing batts:
- Check for moisture, stains, or musty odors—signs of leaks or insufficient ventilation.
- Remove batts showing mold, pest infestation, or nesting.
- Repair or replace batts that are thin, matted, or poorly fitting.
- Take note of areas needing extra attention or repair.
- If insulation dates from pre-1980s and looks suspicious, test for asbestos. Never disturb or cover asbestos or vermiculite insulation—call licensed professionals.
Example: Discard and replace batts that are gray, crumbly, or excessively shedding fibers.
Locate Air Leaks and Inspect Ventilation
Sealing attic air leaks is critical before adding insulation:
-
Use a smoke pencil or infrared camera to identify drafts around access hatches, wiring, pipes, and where walls meet floors.
Tip: It’s easier to detect leaks on windy days. -
Ensure ridge, soffit, and gable vents are clear of obstructions.
Look for debris, misplaced vent baffles, or insulation blocking vents. - Inspect the roof sheathing for condensation or frost—signs of humidity problems.
Mark all leak locations to address during your insulation upgrade.
Assess Accessibility and Obstructions
Confirm the attic is safely accessible:
- Remove clutter and stored items.
- Identify obstacles like ductwork, pipes, or platforms that may impede access.
- Ensure adequate headroom and secure footing for spray foam application.
- Expose and mark all wiring or junction boxes before spraying.
- Seal and insulate ductwork separately for the best performance.
If your attic has knob-and-tube wiring, consult a licensed electrician before insulating. Modern insulation can be hazardous with old wiring—never proceed without professional guidance.
Materials and Tools Checklist
Materials
- Closed-cell or open-cell spray foam kit (plan 10–20% extra for waste)
- NIOSH-approved respirator, chemical-resistant gloves, goggles, disposable coveralls
- Replacement fiberglass batts (match R-value and size)
- Fire-rated caulk or foam sealant, caulking gun
- Plastic sheeting and painter’s tape
- Measuring tape, marker, level
- Utility knife and scissors
- Ladder or step stool for attic access
- Headlamp, flashlight, or work lights
- HEPA vacuum or broom
- Spray foam applicator with spare nozzles and nozzle lubricant
Spray Foam Specifications
- Closed-cell R-value: ~6.5 per inch; open-cell: ~3.7 per inch
- Apply above 40°F/4°C; avoid high humidity
- Cure time: usually 8–24 hours for DIY kits; may take longer if cool or humid
- Requires code-compliant ignition or thermal barrier (like drywall or approved coating)—confirm with local authorities
- UL listing or similar safety certification
- Favor low global warming potential (HFO-based) kits when possible
Example calculation: For a 2-inch layer of closed-cell foam in a 1,000 sq. ft. attic, you’ll need about 1,700–1,800 board feet of material.
Step-by-Step Insulation Process
- Clear the Attic
Remove all stored items and debris. Clean using a broom or HEPA vacuum for a dust-free workspace.
Tip: HEPA vacuums help reduce allergens and improve air quality. - Inspect and Repair Batts
Check all batts for dampness, mold, and compression. Remove damaged or wet batts. Ensure attic areas are dry before installing new batts, and cut replacements to fit snugly.
Detail: Place new batts fluffy side up, avoiding compression. - Seal Air Leaks
Use fire-rated caulk or foam sealant around gaps—pipes, wires, hatches, fixtures, and ductwork. Pay attention to perimeters and wall tops.
Example: Address ceiling penetrations, IC-rated recessed lights, and attic stairs (add weather-stripping if needed). - Mask Non-Target Areas
Protect HVAC, electrical, and surfaces not being insulated with plastic sheeting and tape. Keep ventilation openings clear.
Tip: Use cardboard or plywood for barriers to catch overspray. - Use Personal Protective Equipment (PPE)
Wear respirator, gloves, goggles, and disposable suit. Only essential personnel should be present during spraying.
Note: Spray foam off-gassing can produce strong odors—ventilate well during and after installation. - Apply Spray Foam
Follow manufacturer instructions, applying in even, moderate coats. In vented attics, prioritize edges, rim joists, and penetrations. For unvented assemblies, create a continuous layer over the roof deck. Move batts only as necessary. Allow foam to cure before carefully repositioning batts.
Apply in thin passes and overlap paths for consistent coverage.
Tip: Work from the farthest point toward the attic entrance for easier exit. - Allow Foam to Cure
Let foam cure per kit instructions (often overnight). Cooler or more humid conditions will slow curing. Do not disturb until fully set.
Test: Gently touch foam with a stick—no longer tacky means it’s cured. - Inspect and Touch Up
Check for missed spots, thin coverage, or cracks, and touch up as needed. Ensure vents, wiring, and junction boxes remain uncovered.
Tip: Use a depth gauge or ruler to confirm insulation thickness. - Restore Batts and Check Ventilation
Reinstall or fluff displaced batts, ensuring they’re not compressed. Confirm vents stay open for proper airflow.
Tip: Use unfaced batts unless your code specifies otherwise for vapor barrier placement. - Remove Masking and Clean Up
Remove plastic and tape. Clean any overspray per manufacturer’s instructions. Dispose of all materials according to local hazardous waste guidelines.
Note: Some foam kits have recycling options for empty canisters.
Post-Installation: Inspection and Maintenance
Confirm Proper Coverage
Ensure the spray foam and batts create a seamless, gap-free insulation layer. Watch for any exposed or displaced insulation.
Tip: Use an infrared camera during temperature extremes to spot incomplete sections or air leaks.
Ventilation and Moisture Checks
-
For vented attics: Double-check that ridge, soffit, and gable vents remain open. Proper ventilation prevents condensation and mold.
Install vent baffles at eaves to keep soffit vents unobstructed, even under insulation. - For conditioned (unvented) attics: Make sure foam forms a continuous vapor and air barrier along the roof deck, especially at transitions.
Long-Term Care
- Avoid putting heavy items on insulation to prevent compression.
- Inspect the attic every 6–12 months for moisture, pests, or shifting insulation.
- Touch up foam if you notice cracks, crumbling, or separation from the surface.
- Tip: Use plywood walkways for attic access to protect insulation. If humidity persists, consult a professional about vapor barriers or mechanical ventilation.
Safety Precautions and Common Mistakes
PPE and Safe Workspace
- Always wear respirator, gloves, goggles, and full-body protection when handling spray foam or fiberglass batts.
- Ventilate attic thoroughly during and after foam application—use fans to increase airflow.
- Keep all non-essential personnel out of the attic during spraying and curing.
- If you start feeling dizzy, irritated, or develop a headache, leave the attic for fresh air immediately.
- Keep a fire extinguisher on hand—spray foam is flammable while curing.
Common Mistakes to Avoid
- Don’t apply too much foam in a single pass—thick layers risk overheating, sagging, or excess fumes. Apply in thin layers only.
- Avoid compressing batts with spray foam or stored objects.
- Don’t block attic vent openings unless changing to a conditioned attic per code.
- Never spray foam over unapproved wiring, lights, or heaters—consult an electrician if unsure.
- Don’t proceed if there’s evidence of leaks, high humidity, or condensation—address problems before insulating.
- Never disturb or cover asbestos or vermiculite insulation—hire professionals for remediation.
- Repair roof leaks or structural issues before spraying foam insulation.
- Don’t leave partially used foam cans attached—follow disposal instructions to avoid leaks or pressure build-up.
Waste Disposal and Reentry
- Dispose of empty spray foam cans, PPE, and waste according to hazardous waste regulations—do not place with regular trash.
- Ventilate attic thoroughly after spraying, and wait until odors are gone and foam fully cures before reentering. Follow foam manufacturer recommendations for minimum reentry time.
- Tip: Keep Safety Data Sheets (SDS) for all products used for future reference or inspections.
Frequently Asked Questions (FAQ)
- Can I combine spray foam and fiberglass batts?
Yes, combining spray foam and batts is an effective way to upgrade attic insulation. Seal air leaks, maintain ventilation, and avoid double vapor barriers for best results. Always check your local building codes.
Detail: Codes often permit a thin “flash coat” of foam beneath standard batts. - How long do spray foam and batts last?
With correct installation, spray foam can last 30–50 years or more. Fiberglass batts typically last 20–30 years if kept dry and uncompressed. - When should I hire a professional?
If you discover extensive mold, moisture, or pest damage, hazardous insulation (asbestos/vermiculite), or if your roof structure is complex, call a qualified contractor. Only pros should handle asbestos removal.
Example: Cathedral ceilings or unvented attic designs often require expert insulation solutions. - Will new insulation over batts cause odors or air issues?
If existing batts are completely dry and clean, risks are low. Address any mold or animal problems before installing, and ventilate well during and after foam application. - Can spray foam fix a leaky roof?
No—repair all roof leaks and flashing before applying insulation. Spray foam will not address current moisture problems.
Conclusion
Boosting attic insulation with spray foam over fiberglass batts provides increased comfort and energy savings when done thoroughly and safely. Inspect, prep, and follow detailed steps for installation, always prioritizing safety and abiding by local codes.
For further assistance, consult trusted resources such as Energy Star, local building departments, insulation manufacturer guides, and certified contractors. The U.S. Department of Energy, Building Science Corporation, and utility programs offer additional information.